Catalog displays information about various products along with its specifications. Products can be uploaded to a new catalog being created or an exisiting catalog. The procedure remains same.
After creating a catalog, it opens an optional second step to upload products. Or, as we can see, after the Sample Catalog is created, click on the ![]() button.
button.

A modal opens up which provides 2 ways to upload product feed in a catalog. Follow the below navigation after selecting a method to upload product feed:
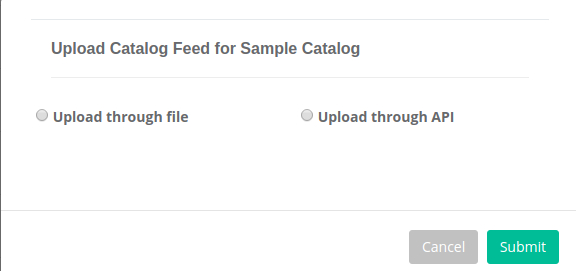
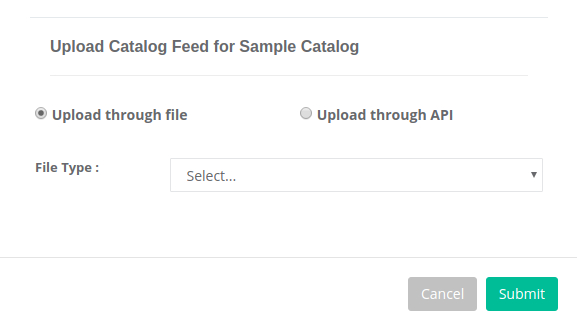
CASE 1 : UPLOAD THROUGH FILE
Step 1:
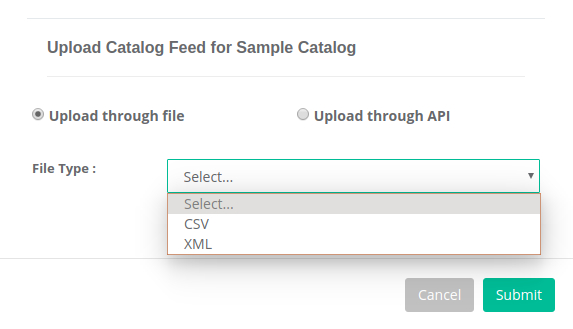
Select the radio button ![]()
A dropdown occurs to choose a file type.
Step 2:
Choose the type of file (containing your products) to upload. Currently, we are supporting 2 file types CSV and XML.
Step 3:
After choosing your desired file type, the modal displays the upload button. Click on ![]()
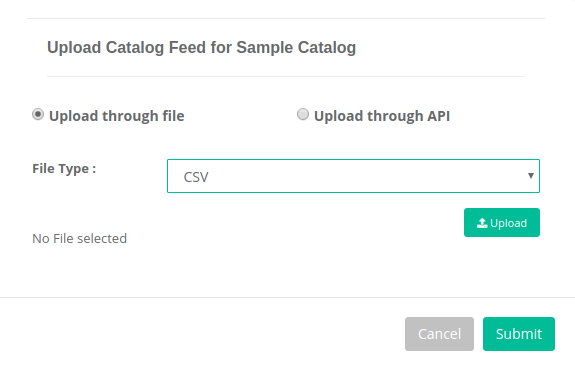
Step 4:
Choose the desired file from your local computer. Now, we can see the name of file gets displayed on the bottom left.
Here, i’ve choosen My Saved Schema.csv
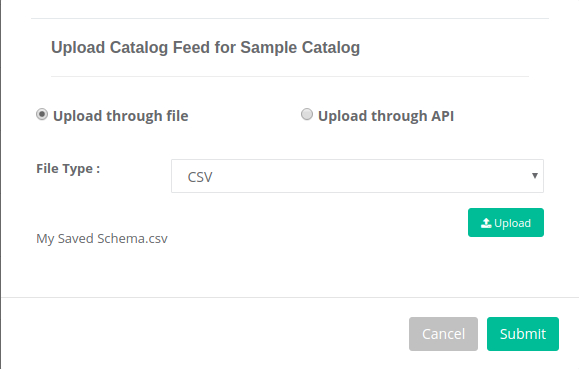
Step 5:
Click on the Submit button. ![]()
After you press Submit, we can see the loading bar besides the corresponding catalog.

The +Upload Feed button and Diagnostics button get disabled till the uploading is in progress.
If everything goes well, the Last Upload Status changes to a green tick indicating that the uploading is successful. Else, even if a single product couldn’t be uploaded from the file or the file itself is not meeting the required conditions, the Last Upload Status changes to a red cross indicating the the uploading was not successful and is counted as a failure.
In case of successful upload, the Product count of Products increases and the corresponding file is added to Diagnostics.

In case of failure:
The uploaded products can be viewed by clicking on View Feed.
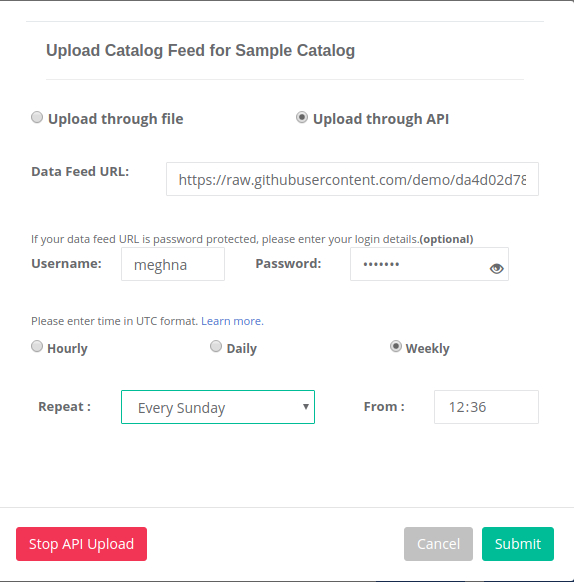
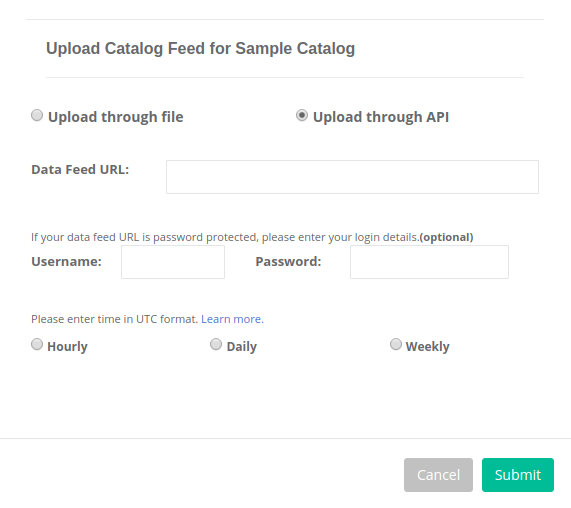
CASE 2 : UPLOAD THROUGH API/URL
Step 1:
Select the radio button 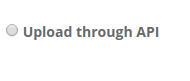
A form opens which requires further details.
Step 2:
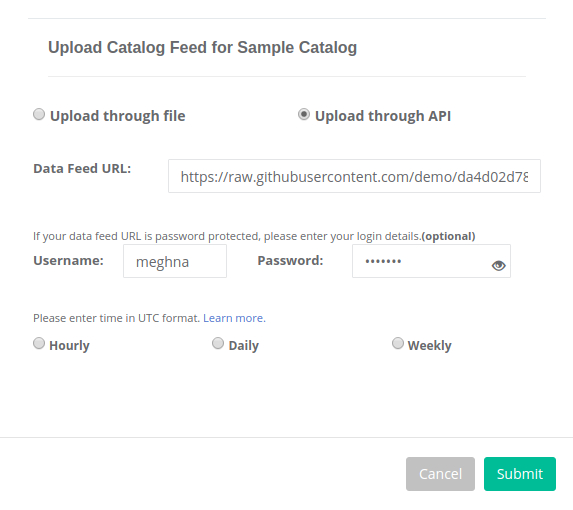
In Data Feed URL, enter the link to your document containing the product specifications which you wish to add to the catalog. The fields Username and Password are optional, and are to be provided if the link you entered above is password protected.
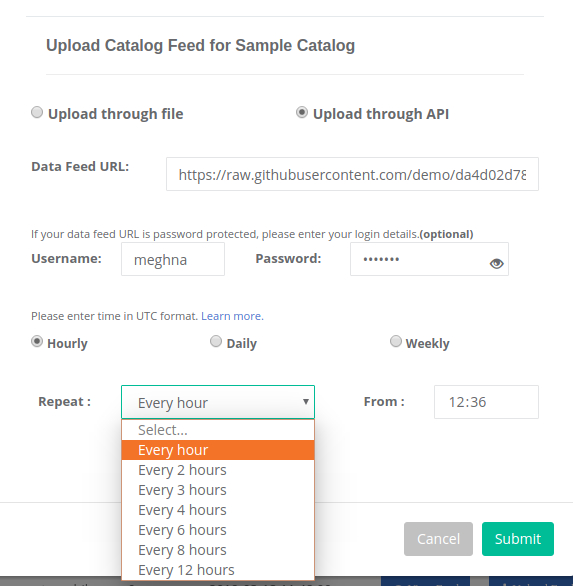
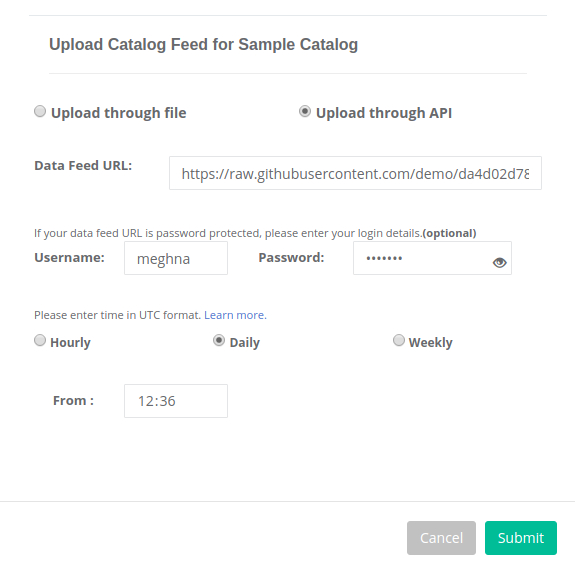
Step 3:
The products are fetched from this link periodically. Set a periodic schedule for your upload. Multiple schedule types are supported.
For any schedule type, set a start time for products upload to start from the specified url in the From field. Please enter the start time in UTC 24 hour format. For instance, if you’re in India and wish to start periodic upload at 6:06 pm, then you should specify the time as 12:36 and for 7:06 pm, you should specify 13:36.
Schedule type Hourly: Choose your desired frequency for upload to repeat from the same url in the Repeat field, e.g. Every hour, every 8 hours etc.
Schedule type Daily: We only need to specify the start time here. Daily at that specific time, products are uploaded from the data feed URL.
Schedule type Weekly: Choose your desired frequency for upload to repeat from the same url in the Repeat field, e.g. Every Sunday, Every Thursday etc. The upload will run every week on your specified day and time.
Step 4:
Click on the Submit button. ![]()
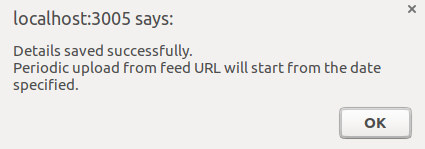
If everything goes well, you should see an alert message like this:
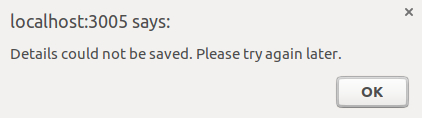
If anything goes wrong the details won’t be saved/updated, and you will see an alert like this:
Step 5:
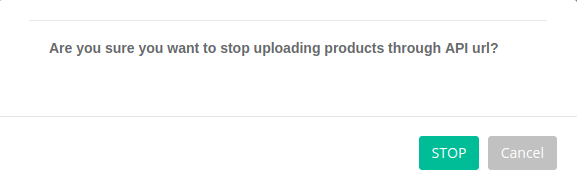
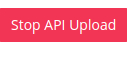
The periodic upload once started, will go on for ever. To stop this process:
- Click the
 button corresponding to the catalog for which you wish to stop upload.
 - The upload modal opens. Choose api url upload and then click the
 button on the bottom left.
 - A confirmation modal opens. Click the
 button to confirm periodic upload stop.
Below are related images to stop periodic upload.